How to display keypad input on LCD using Arduino Uno
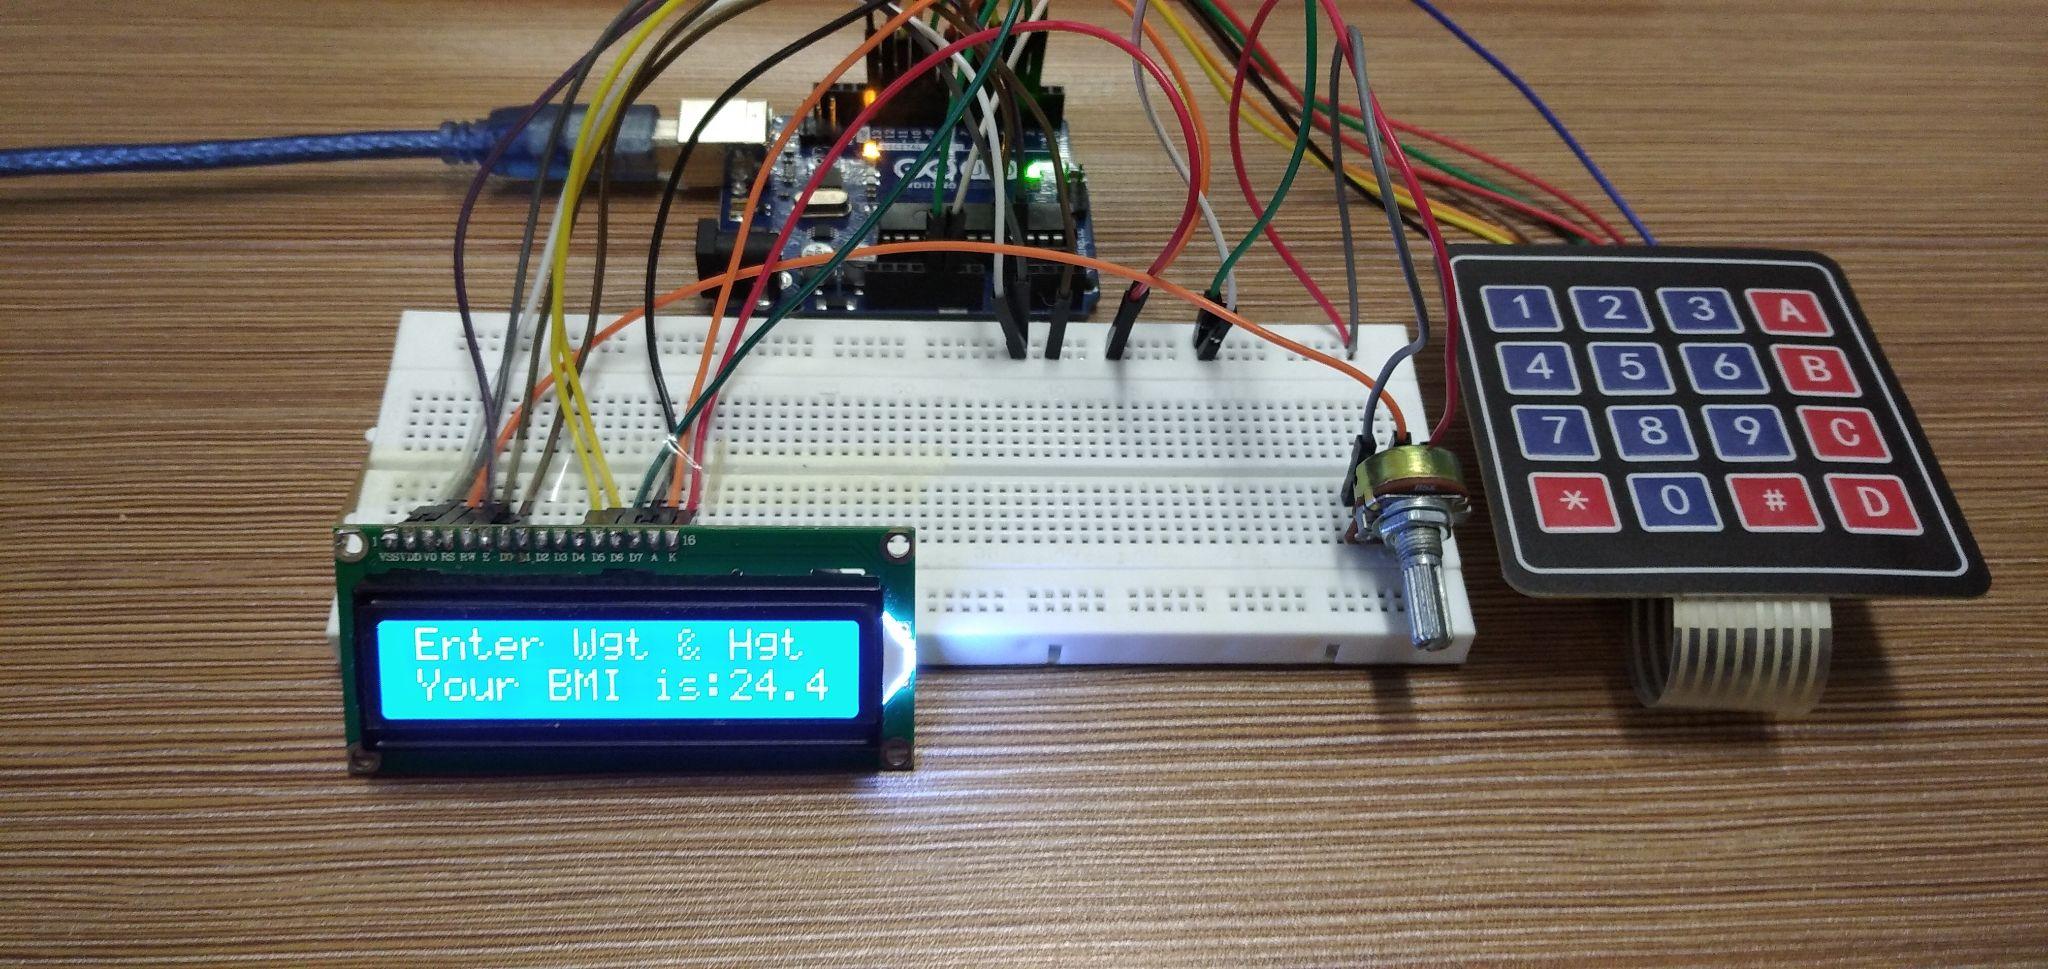
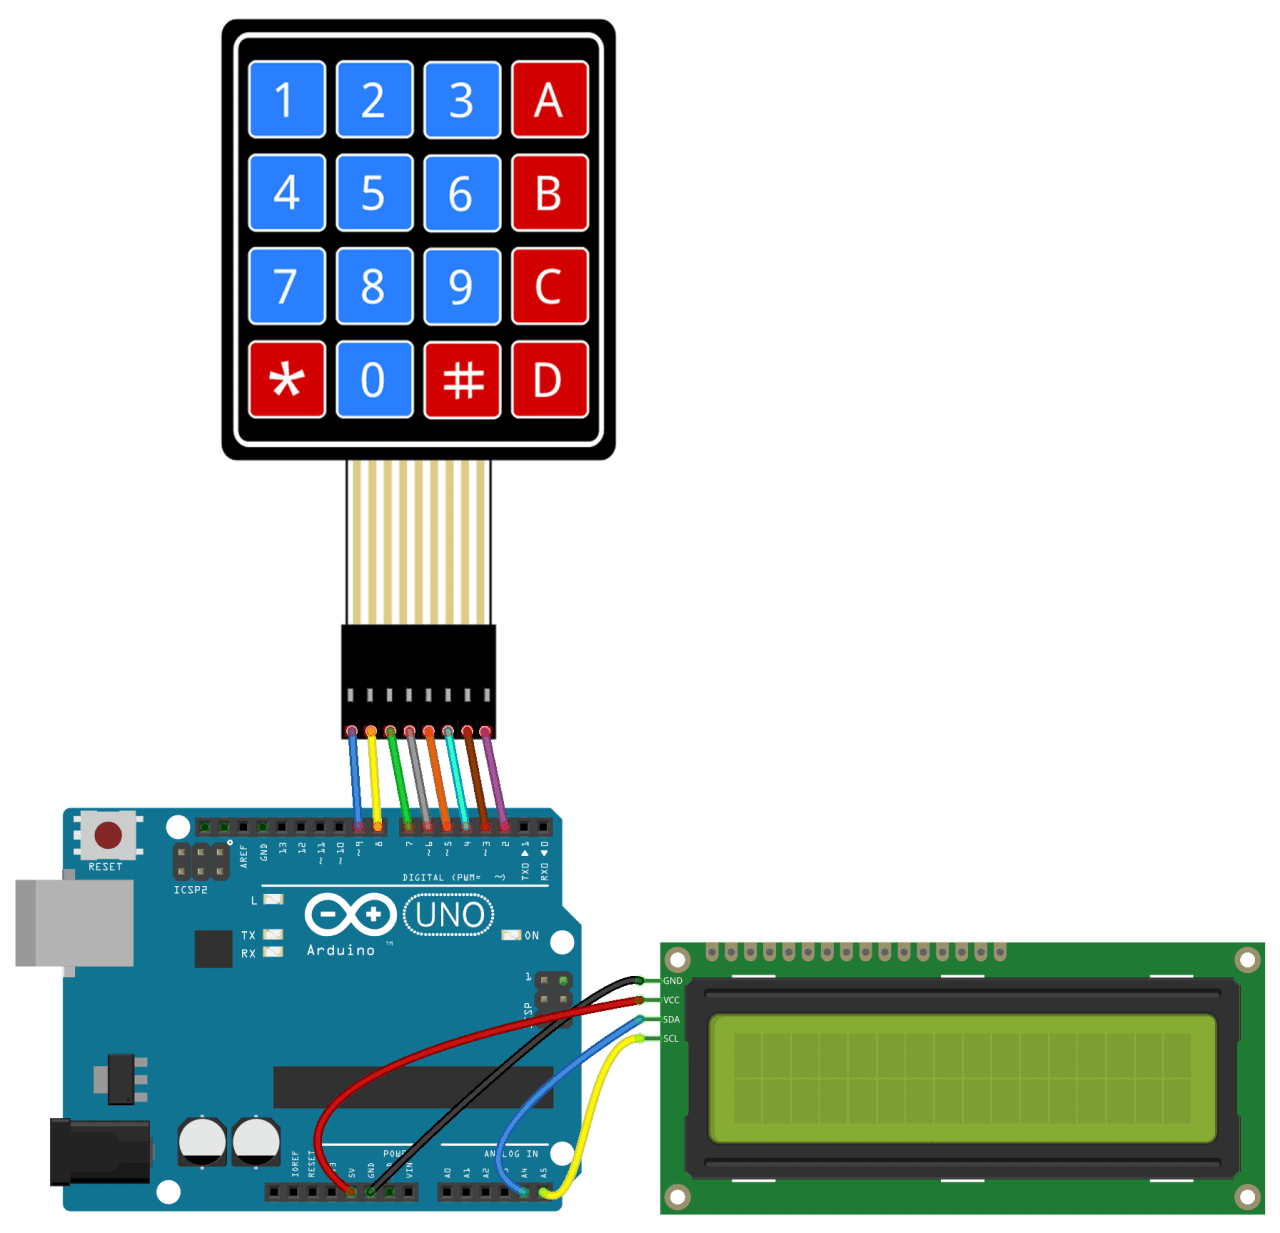
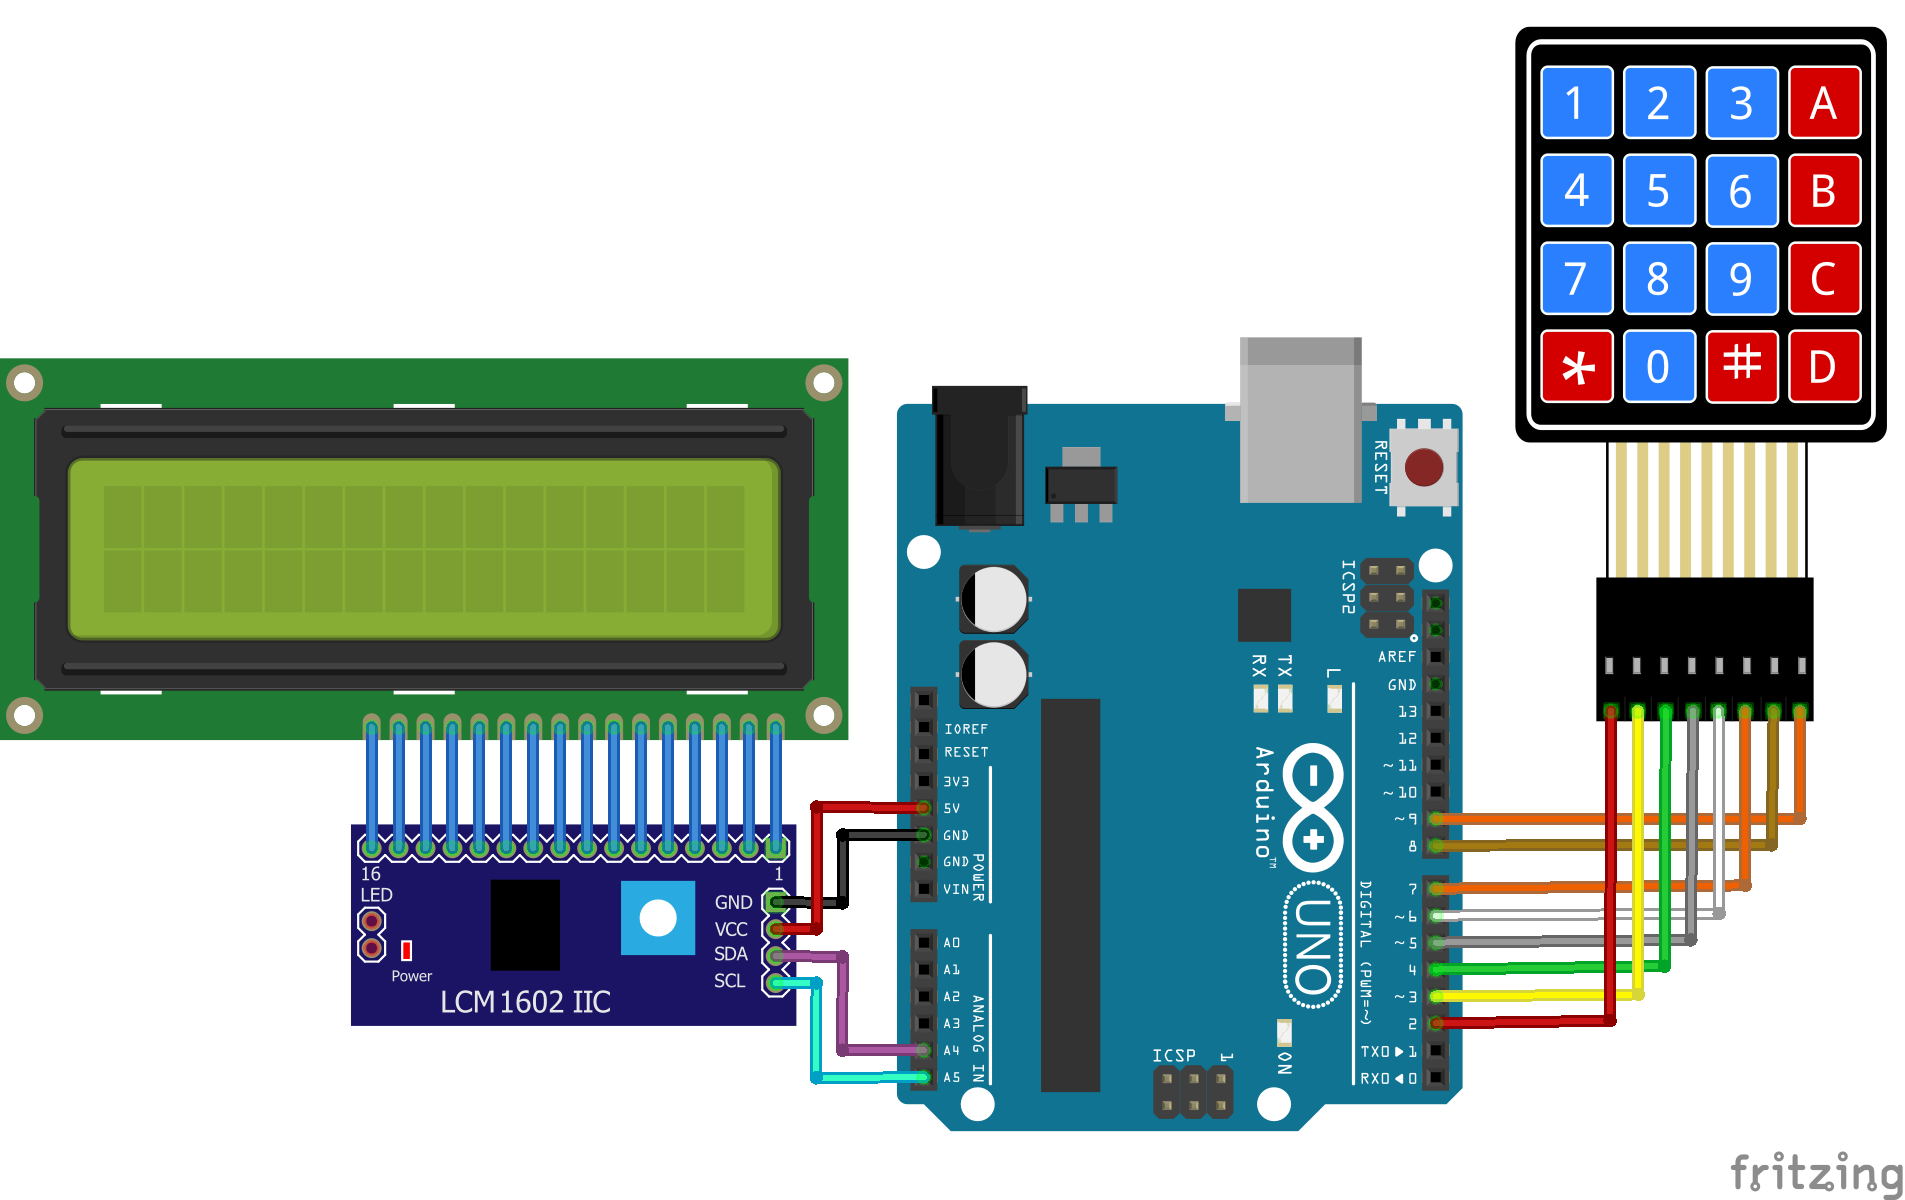
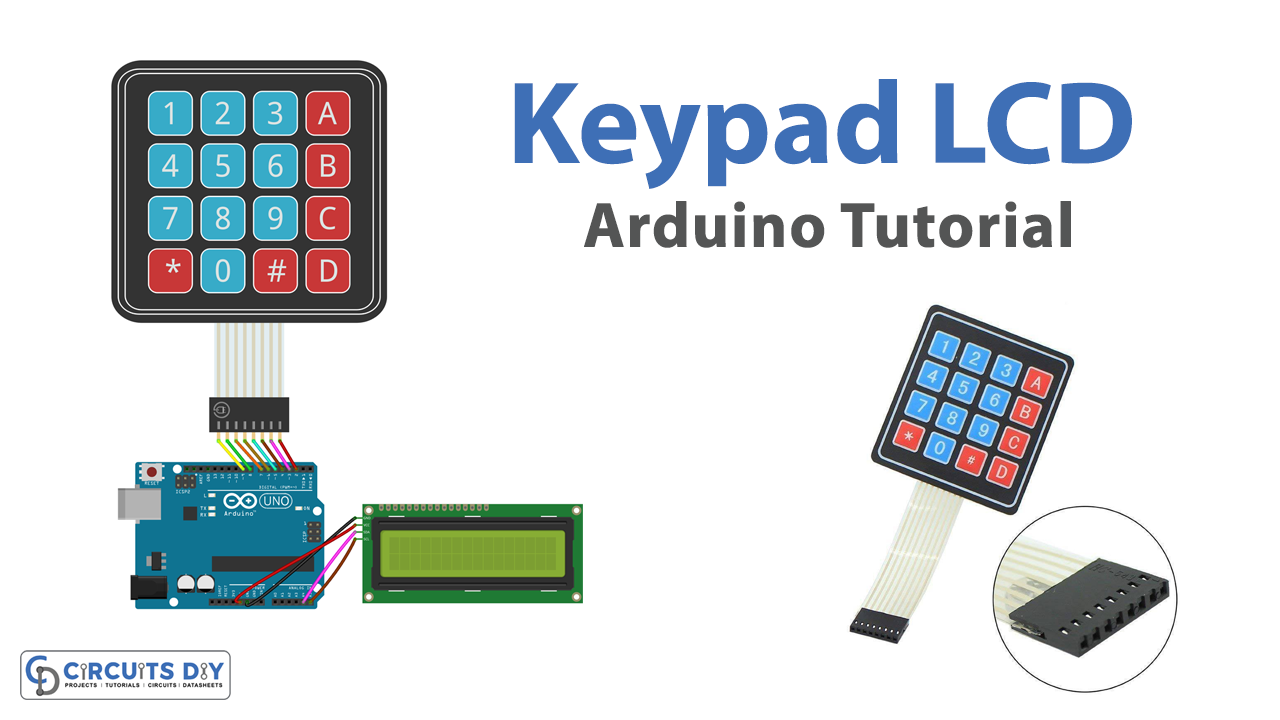
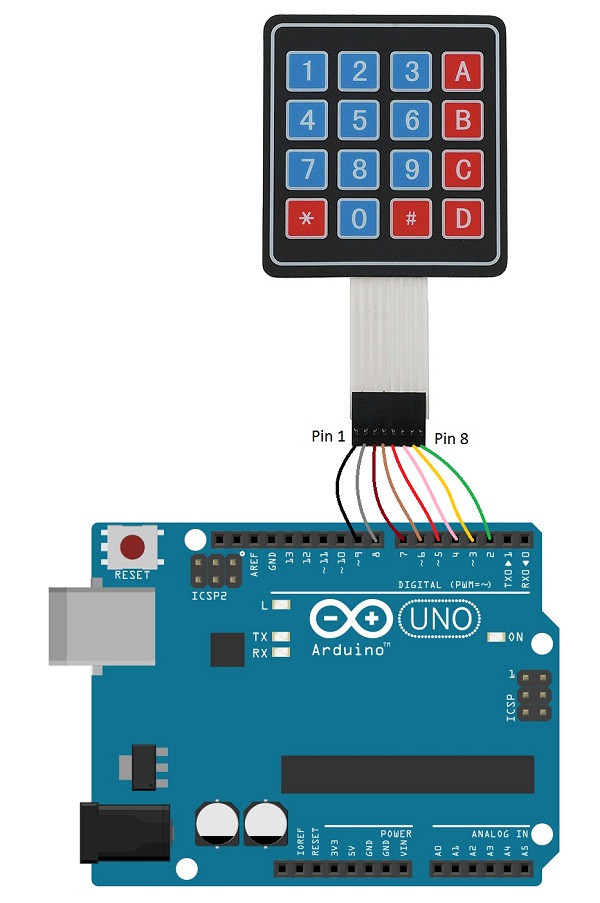
4×4 Keypad Interfacing With Arduino Uno. To connect the 4×4 keypad to Arduino, you need to interface 4-row pins in the keypad which are (R1, R2, R3, R4) with the Arduino digital pins (9, 8, 7, 6), and the 4-column pins which are (C1, C2, C3, C4) with Arduino digital pins (5, 4, 3, 2). The picture down below shows the connection in detail.

Arduino LCD Keypad shield with super scrollable Lmenu system YouTube
Keypad LCD with Arduino Include the libraries for the Keypad and LCD modules: #include
Application of Arduino and Keypad with i2c LCD Arduino Project Hub
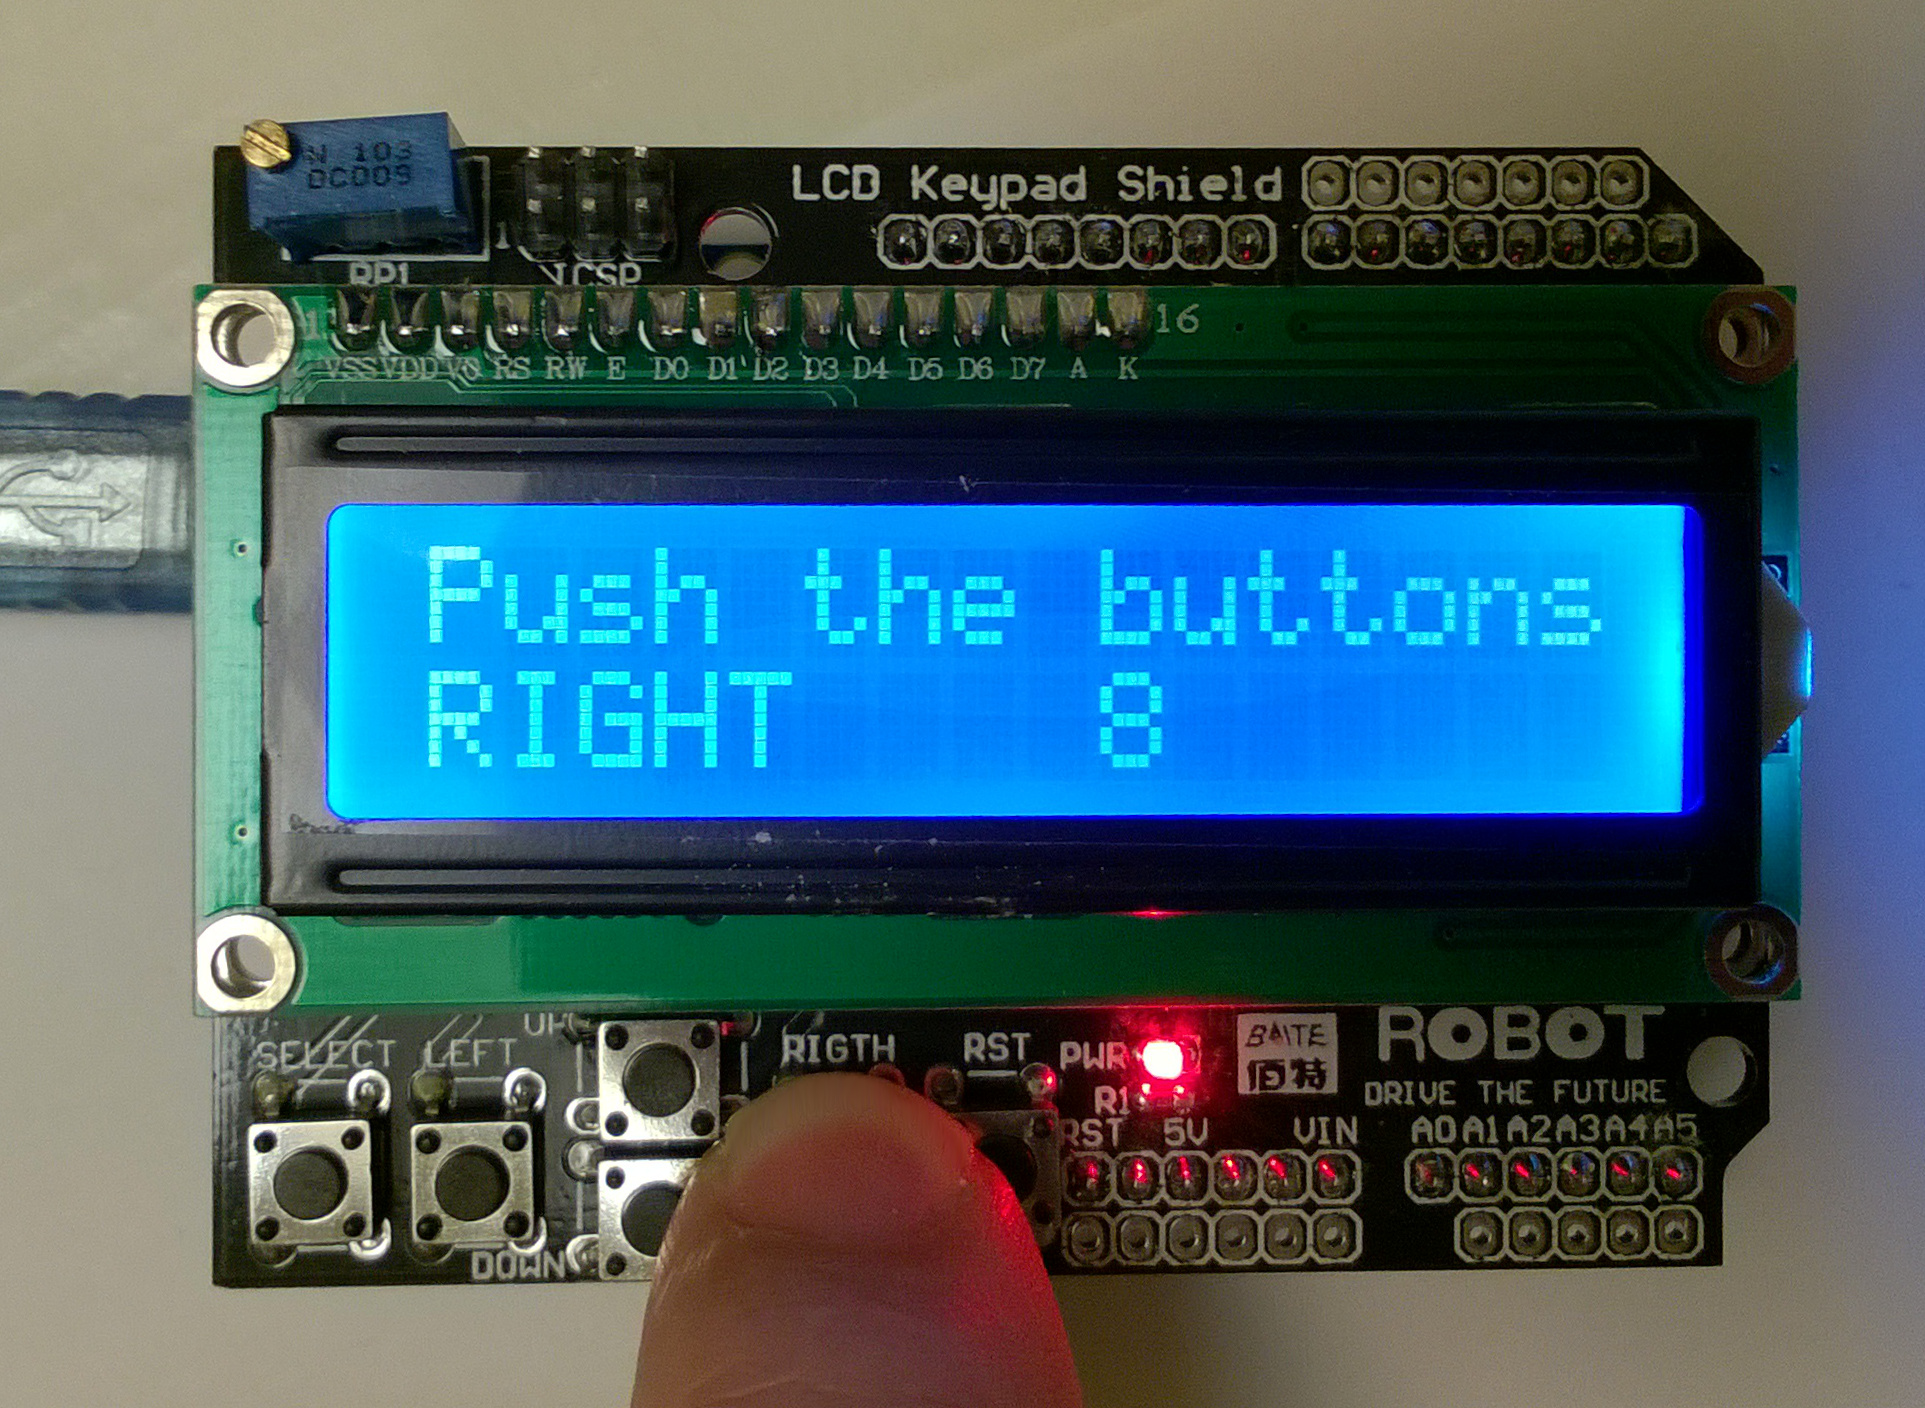
Overview In this tutorial, you'll learn how to use Arduino LCD keypad shield with 3 practical projects. What You Will Learn: How to set up the shield and identify the keys How to scroll text How to display special characters Ask Question Step 1: 1602 Arduino LCD Keypad Shield Features
How to Set Up a Keypad on an Arduino SIN
Ontdek miljoenen producten. Lees reviews en vind bestsellers. Miljoenen producten voor 23.59 uur besteld, morgen in huis
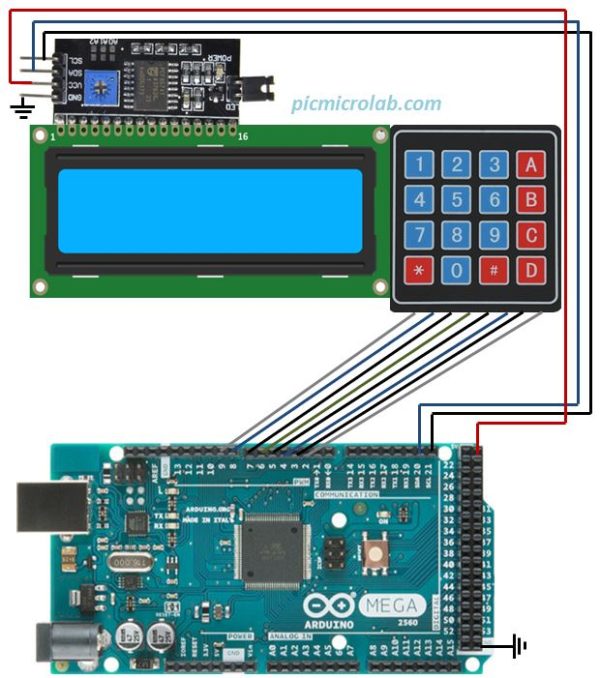
Arduino Base Converter with 4×4 Keypad and I2C LCD Microcontroller
Step 4: Keypad Code :-. Before you can start coding you have to install a library to us the keypad and LCD. To download the library, open IDE and goto :-. Sketch >> Include Library >> Manage Libraries. In the search bar type "Keypad.h" and scroll down to find "Keypad library by Mark Stanley version 3.1.1".
Keypad Interfacing with Arduino 4x4, 4x3 with LCD connection and code
LCD pin 12 to 74HC595 pin 5. LCD pin 11 to 74HC595 pin 4. The next four pins on the LCD screen will have no attachments. LCD pin 6 to 74HC595 pin 3. LCD pin 5 will be connected to the ground rail, and pin 4 will go to 74HC595's pin 1. LCD pin 4 will connect to the potentiometer. Finish up the connections for the LCD screen by connecting pin 2.
LCD Keypad Shield Easy Arduino
In this Arduino LCD tutorial, we will learn how to connect an LCD (Liquid Crystal Display) to the Arduino board. LCDs are very popular and widely used in electronics projects for displaying information. There are many types of LCD. This tutorial takes LCD 16x2 (16 columns and 2 rows) as an example. The other LCDs are similar. ※ NOTE THAT:
Arduino uno + 4x4 Keypad Matrix + LCD i2c screen
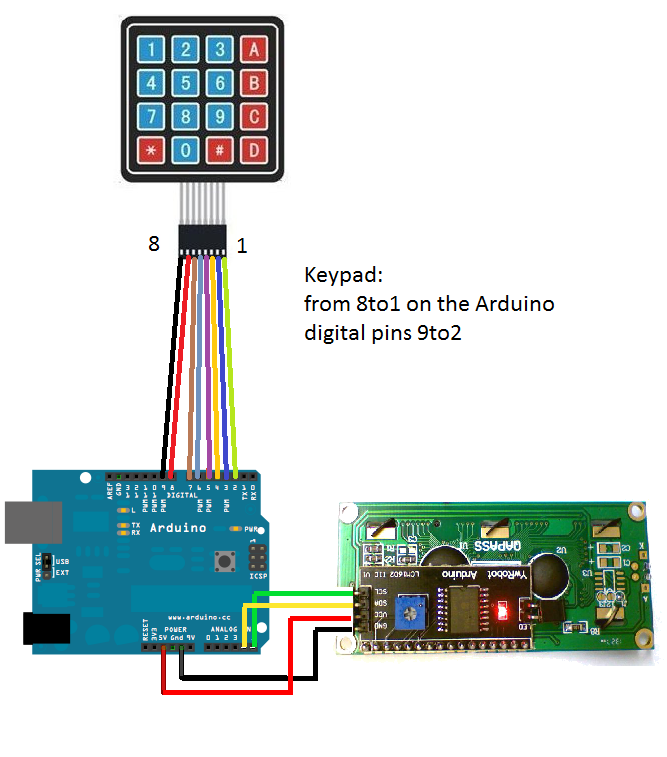
First, connect the 4X4 keypad to the Arduino; connect the first six pins on the 4X4 keypad with the A0 and A5 pins on the Arduino. Then connect the last two pins on the 4X4 keypad module to digital pins 3 and 2 on the Arduino. After that, connect the LCD to the Arduino. The connections for connecting the LCD with the Arduino are as follows:
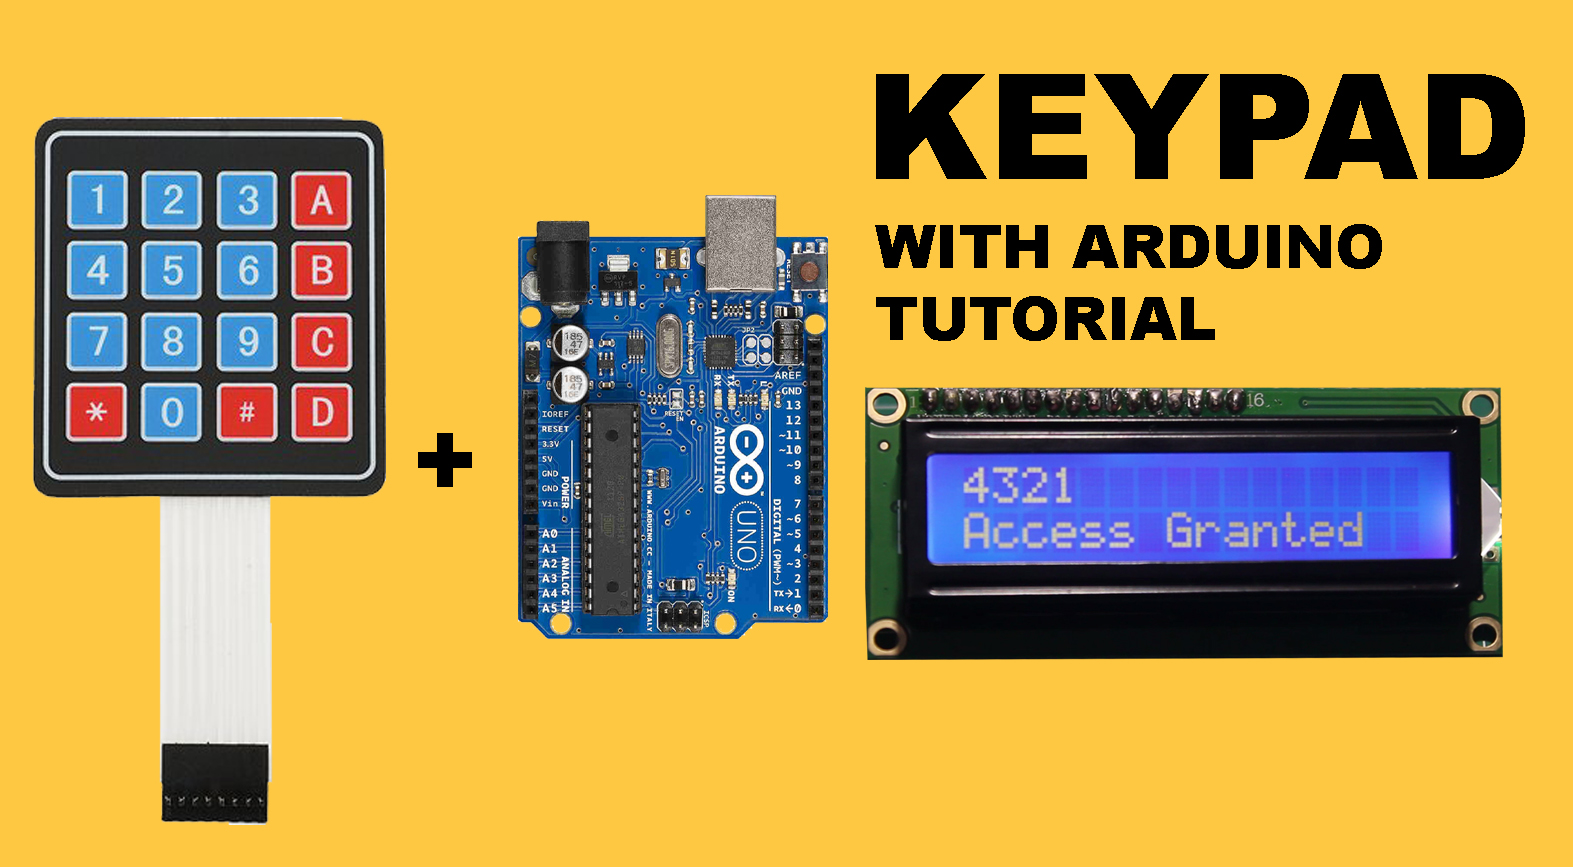
Keypad with arduino tutorial
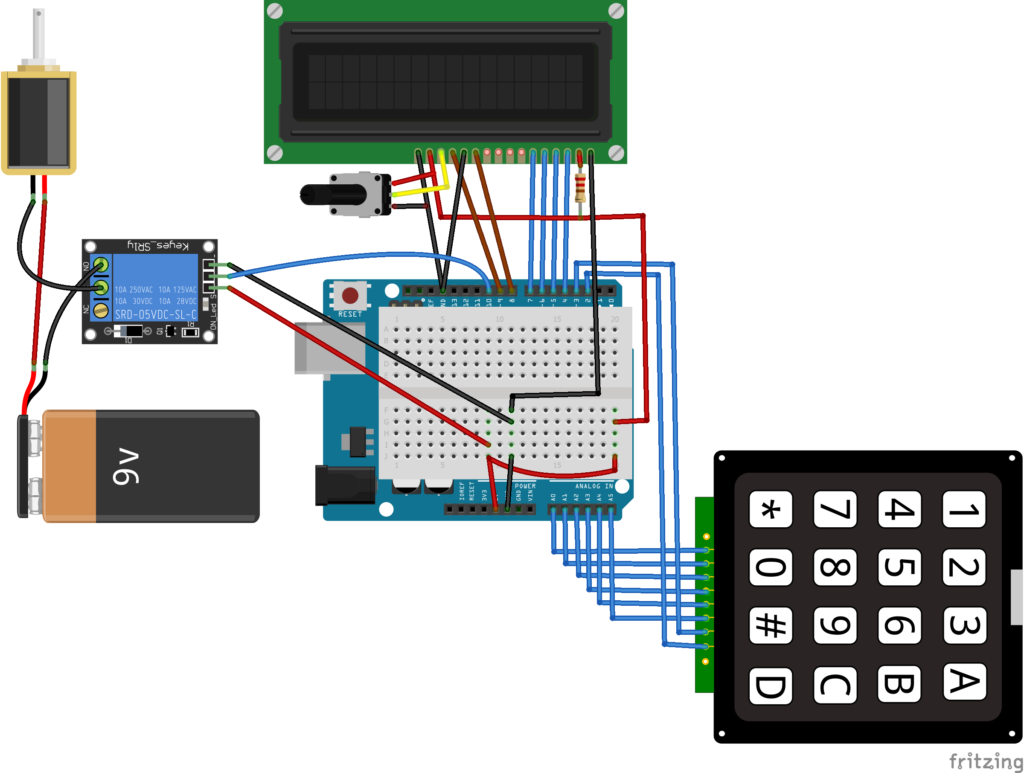
About Keypad and LCD If you do not know about keypad and LCD (pinout, how it works, how to program.), learn about them in the following tutorials: Arduino - Keypad tutorial Arduino - LCD I2C tutorial Wiring Diagram This image is created using Fritzing. Click to enlarge image Arduino Code
How to Make an Arduino Keyless Door Lock System With Keypad and LCD
#arduino #arduinokeypad #arduinolcddisplayIt is tutorial that how to use LCD & Keypad with arduino.You can also check the code!Subscribe me!-----.

Keypad with arduino tutorial
1602 Arduino LCD Keypad Shield Features. Displaying information in electronic projects has always been the most compelling issue. There are various ways to display data. These screens can be so simple such as 7segments or LEDs, or they can be more fascinating such as LCDs. Using LCDs has always been one of the most popular ways to display.
LCD with Keypad Arduino Tutorial
You need to install the Keypad library for the ESP32 Arduino core first before you're able to use it, unlike the built-in Arduino Keypad library. But it's rather simple to do, just open the library manager from the tools menu. Then, search for this keypad library and click install.
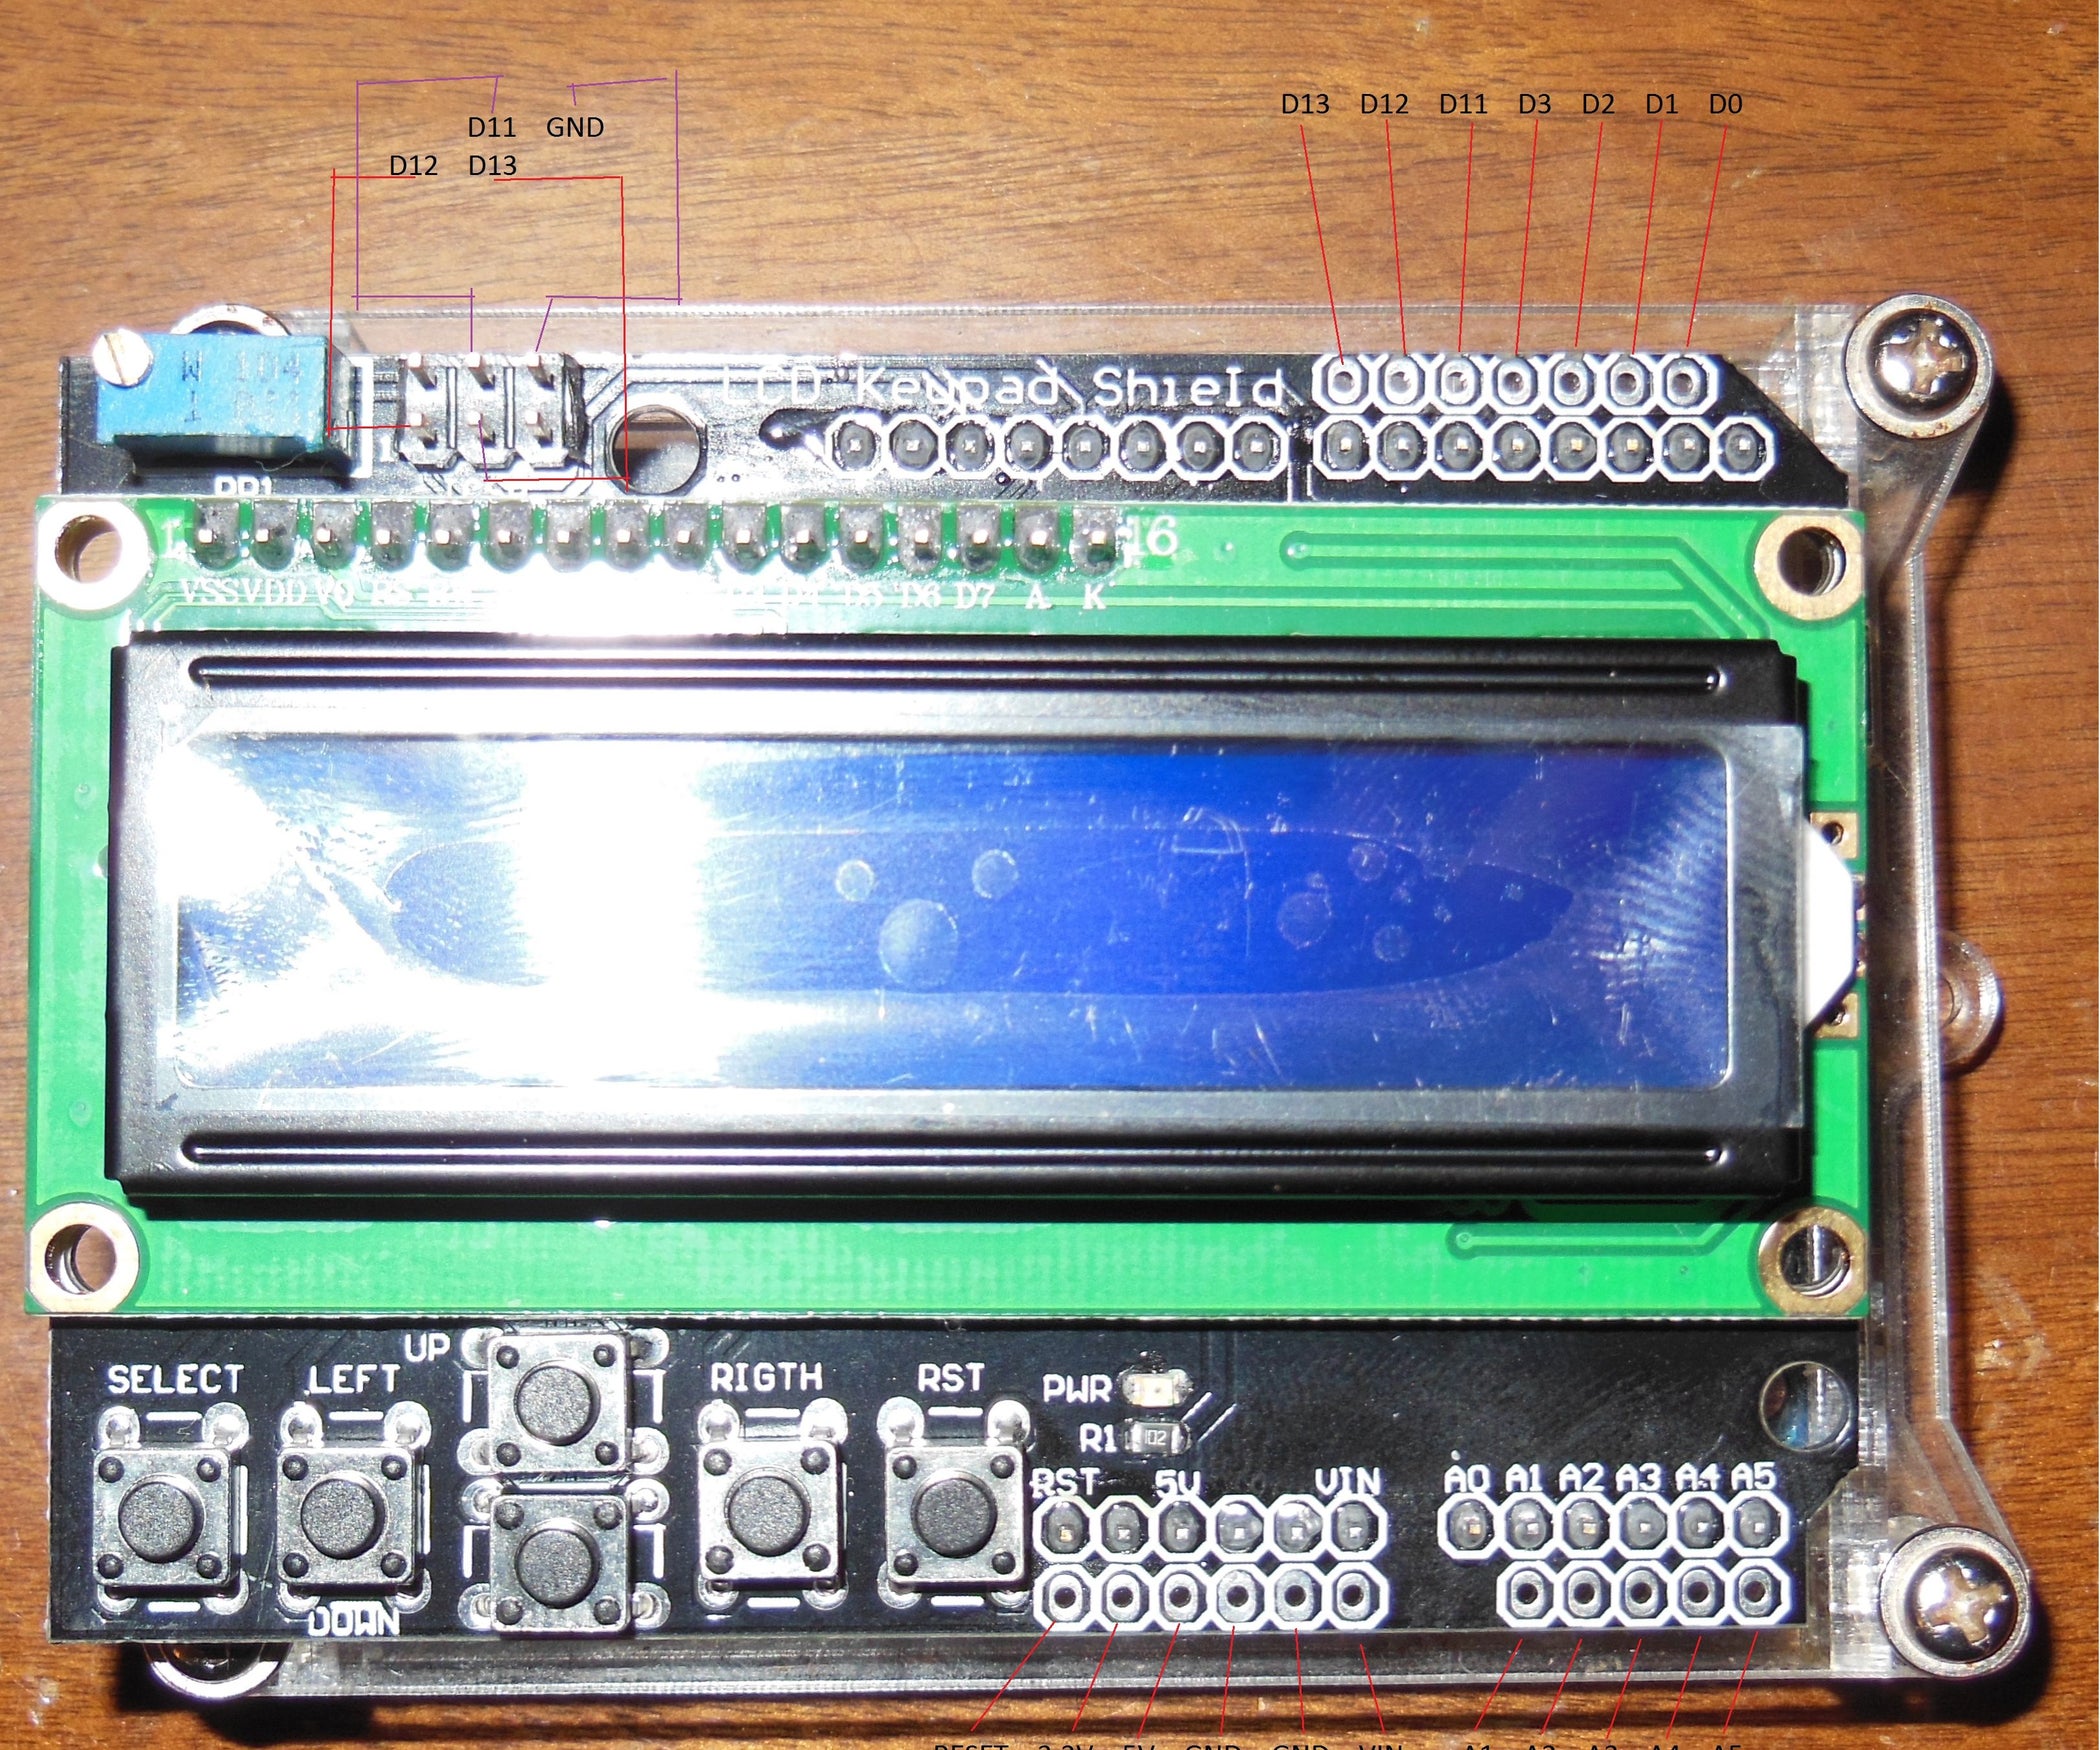
Arduino LCD Keypad Shield 3 Steps Instructables
The keypad is a set of buttons arranged in rows and columns (called matrix). Each button is called key Keypad has various types. Two popular types for DIY projects are keypad 3x4 (12 keys) and keypad 4x4 (16 keys). Pinout Keypad pins are divided into two groups: row and column.

Interfacing 4x4 Keypad, LCD And GSM With Arduino(HOME SECUR Arduino
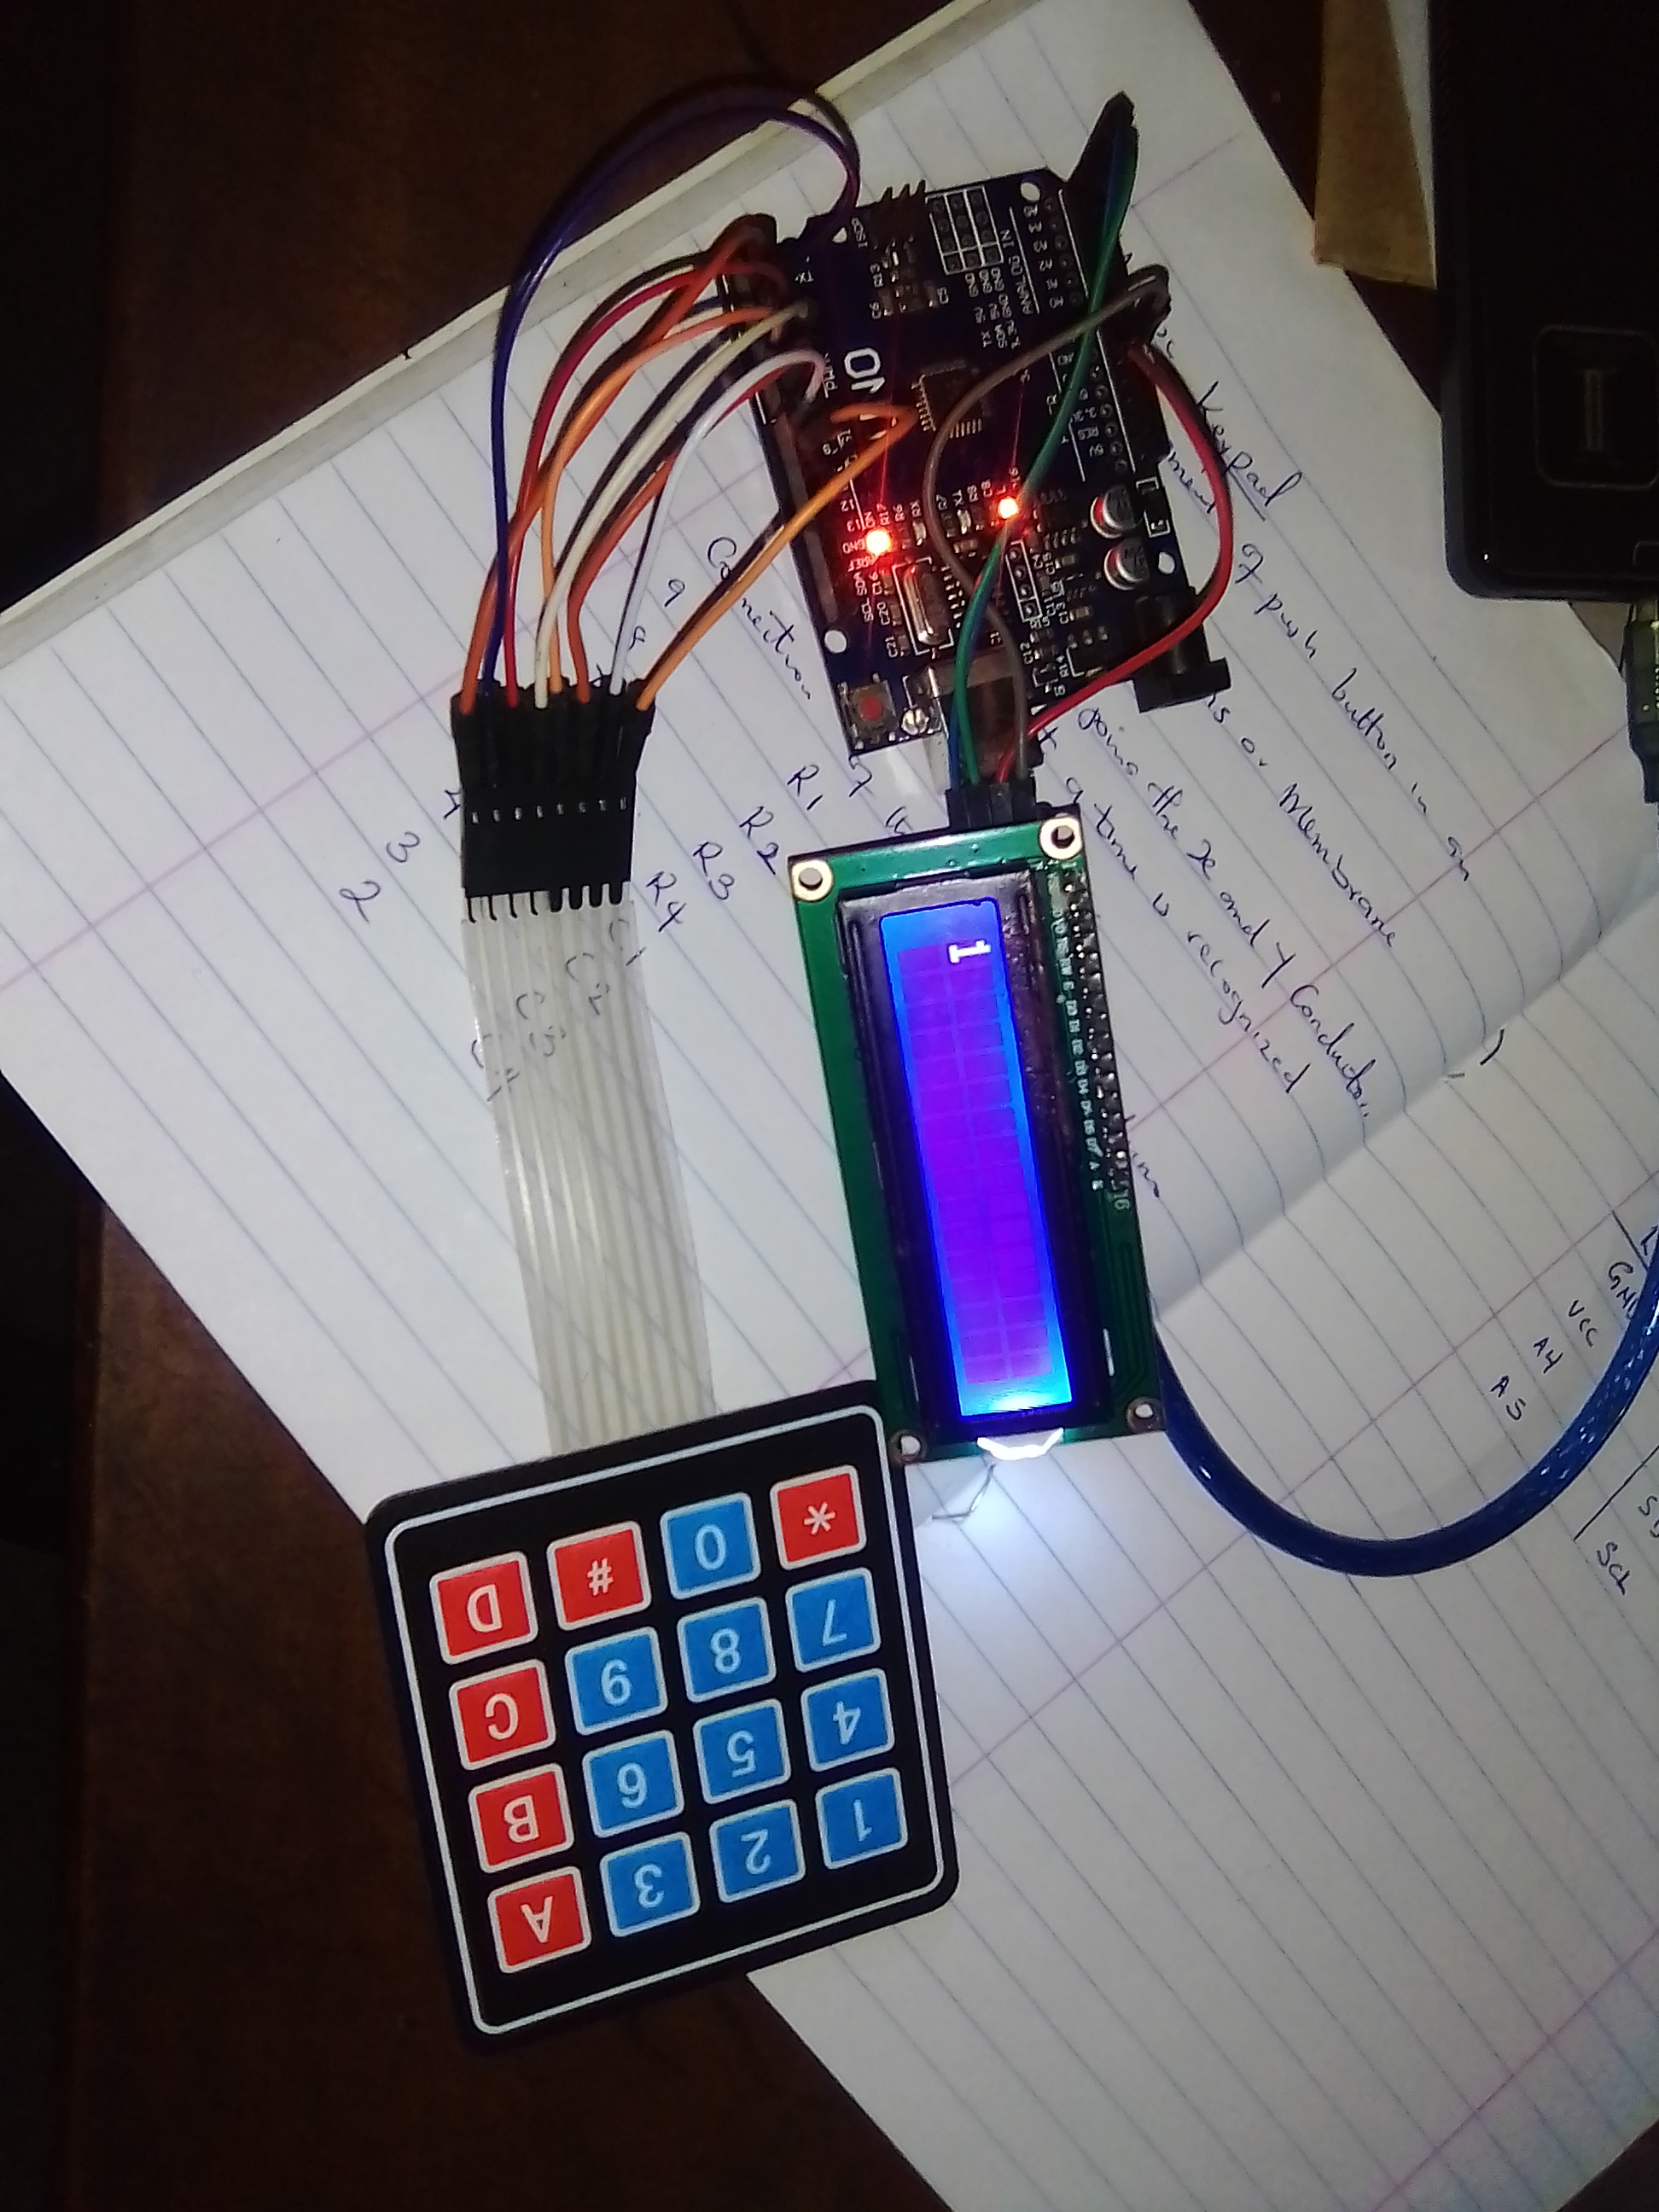
void readKeypad() {. char keypressed = myKeypad.getKey(); String konv = String(keypressed); pad += konv; } Upload the code and now let's try. Now you should see the key that I pressed is displayed on LCD. So we have successfully read the keypad and print every character on the LCD. Keypressed printed on LCD.
Lcd keypad shield arduino mega Actualizado septiembre 2023
How to Set Up a Keypad on an Arduino Posted by Krishna Pattabiraman | Arduino | 28 Keypads are a great way to let users interact with your project. You can use them to navigate menus, enter passwords, and control games and robots. In this tutorial, I'll show you how to setup a keypad on the Arduino.
Interfacing 4x4 Keypad with Arduino
Arduino In Stock at RS. Next Day Delivery Available. Supplying Industrial Components & Parts For Over 75 Years. Over 500,000 Products in Stock.